How to Set Up Your Digital File using Photoshop for Canvas Wrap PRO
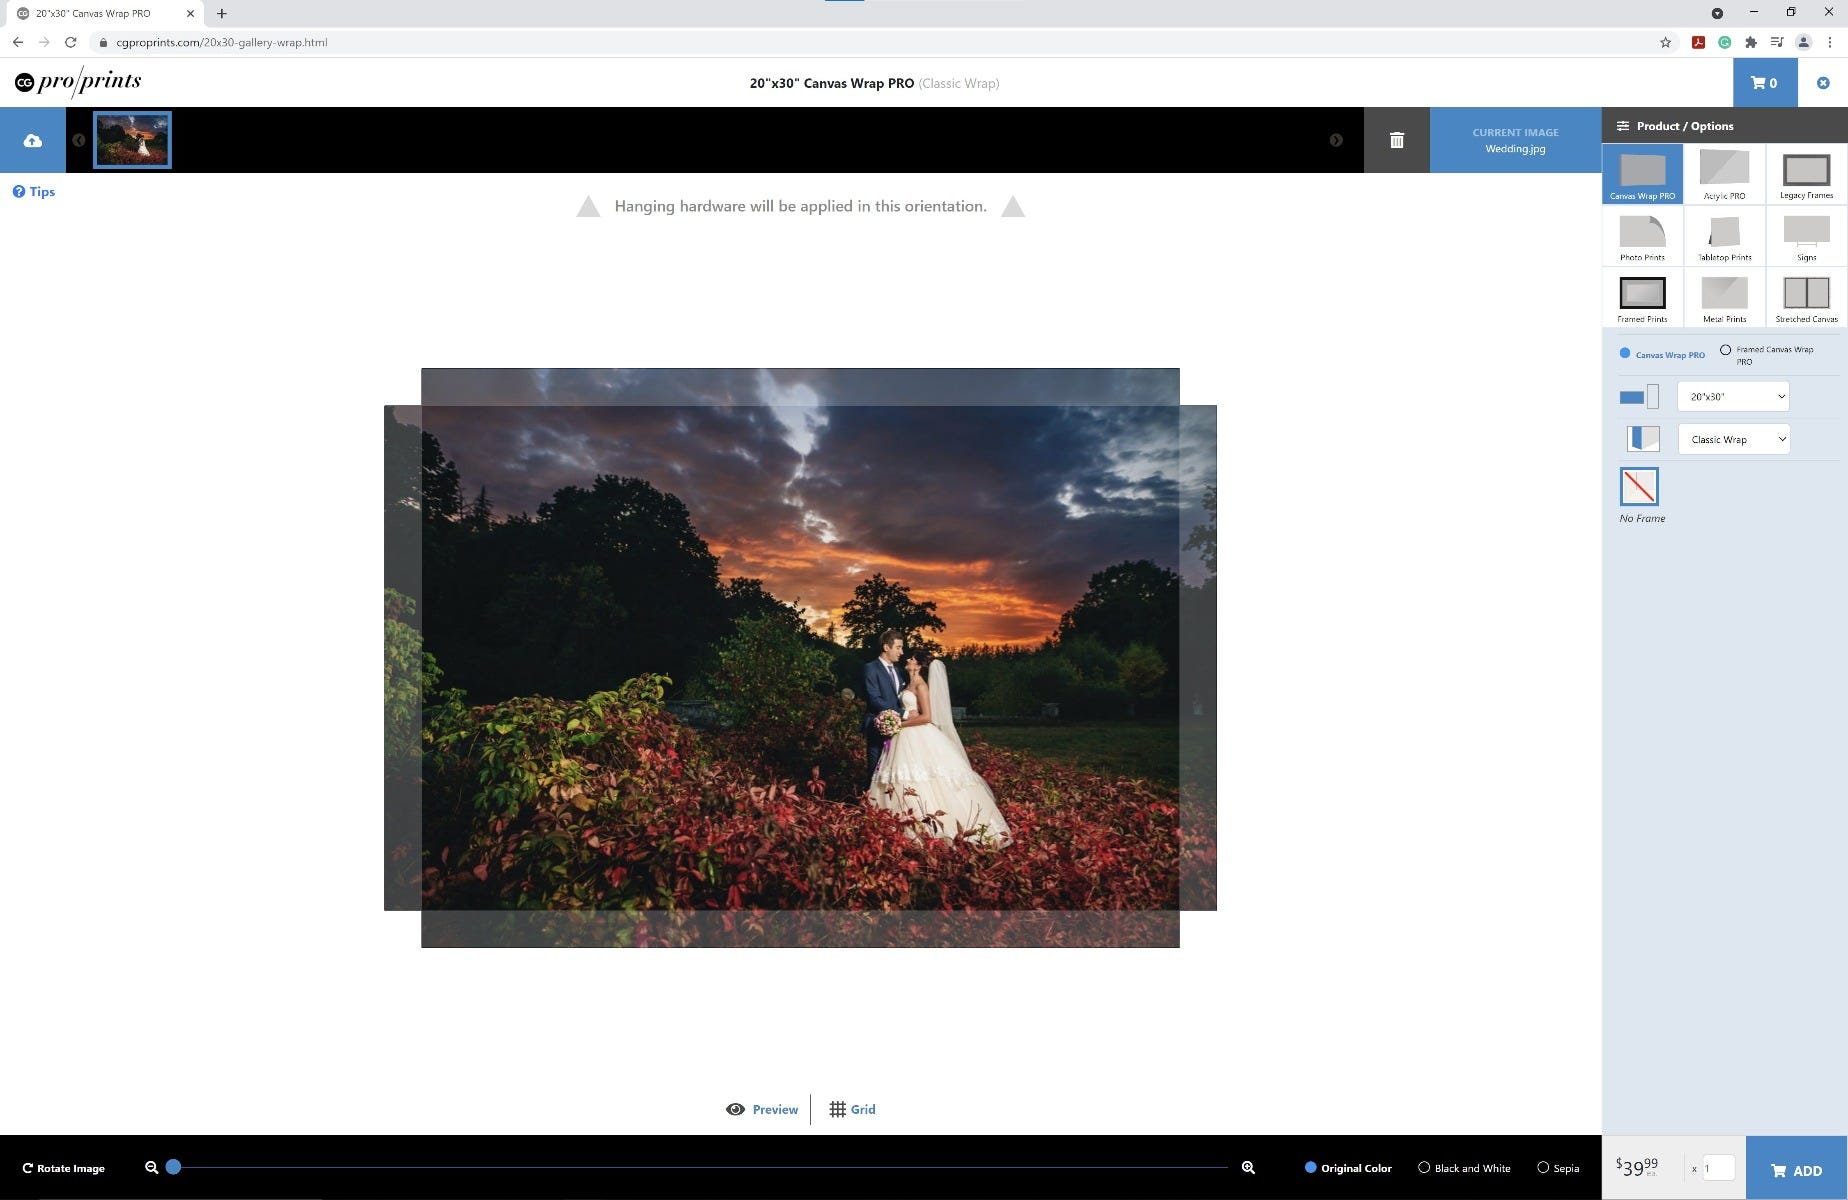
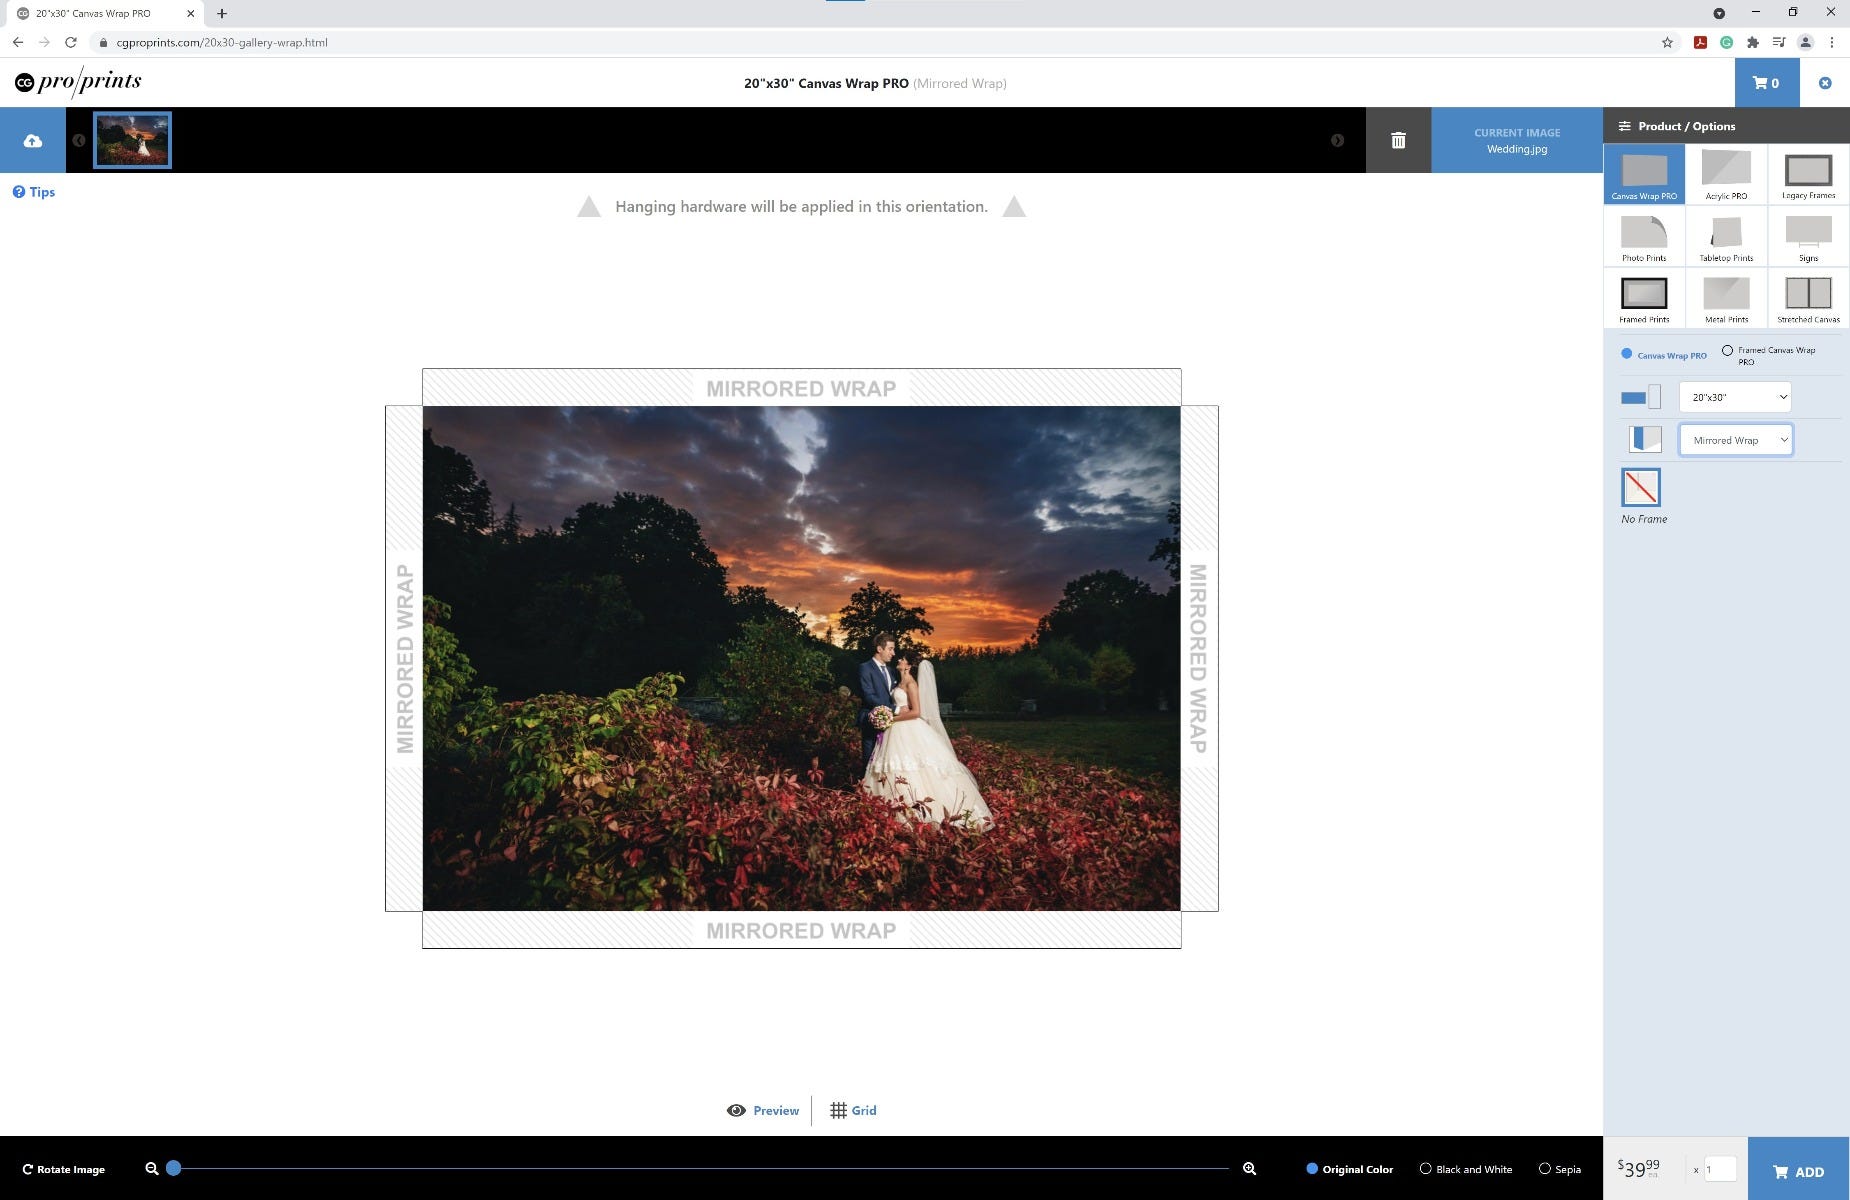
There are a lot of easy tricks to envision exactly how your digital image will look on a Canvas Wrap PRO. By following these general guides while setting up your digital file, you will get full control over cropping your image. Our builder will show you exactly how your image will look on the canvas, as well as offer many options for how the canvas wraps.
Canvas Wrap PRO = 1.5 inches for the wrap per side
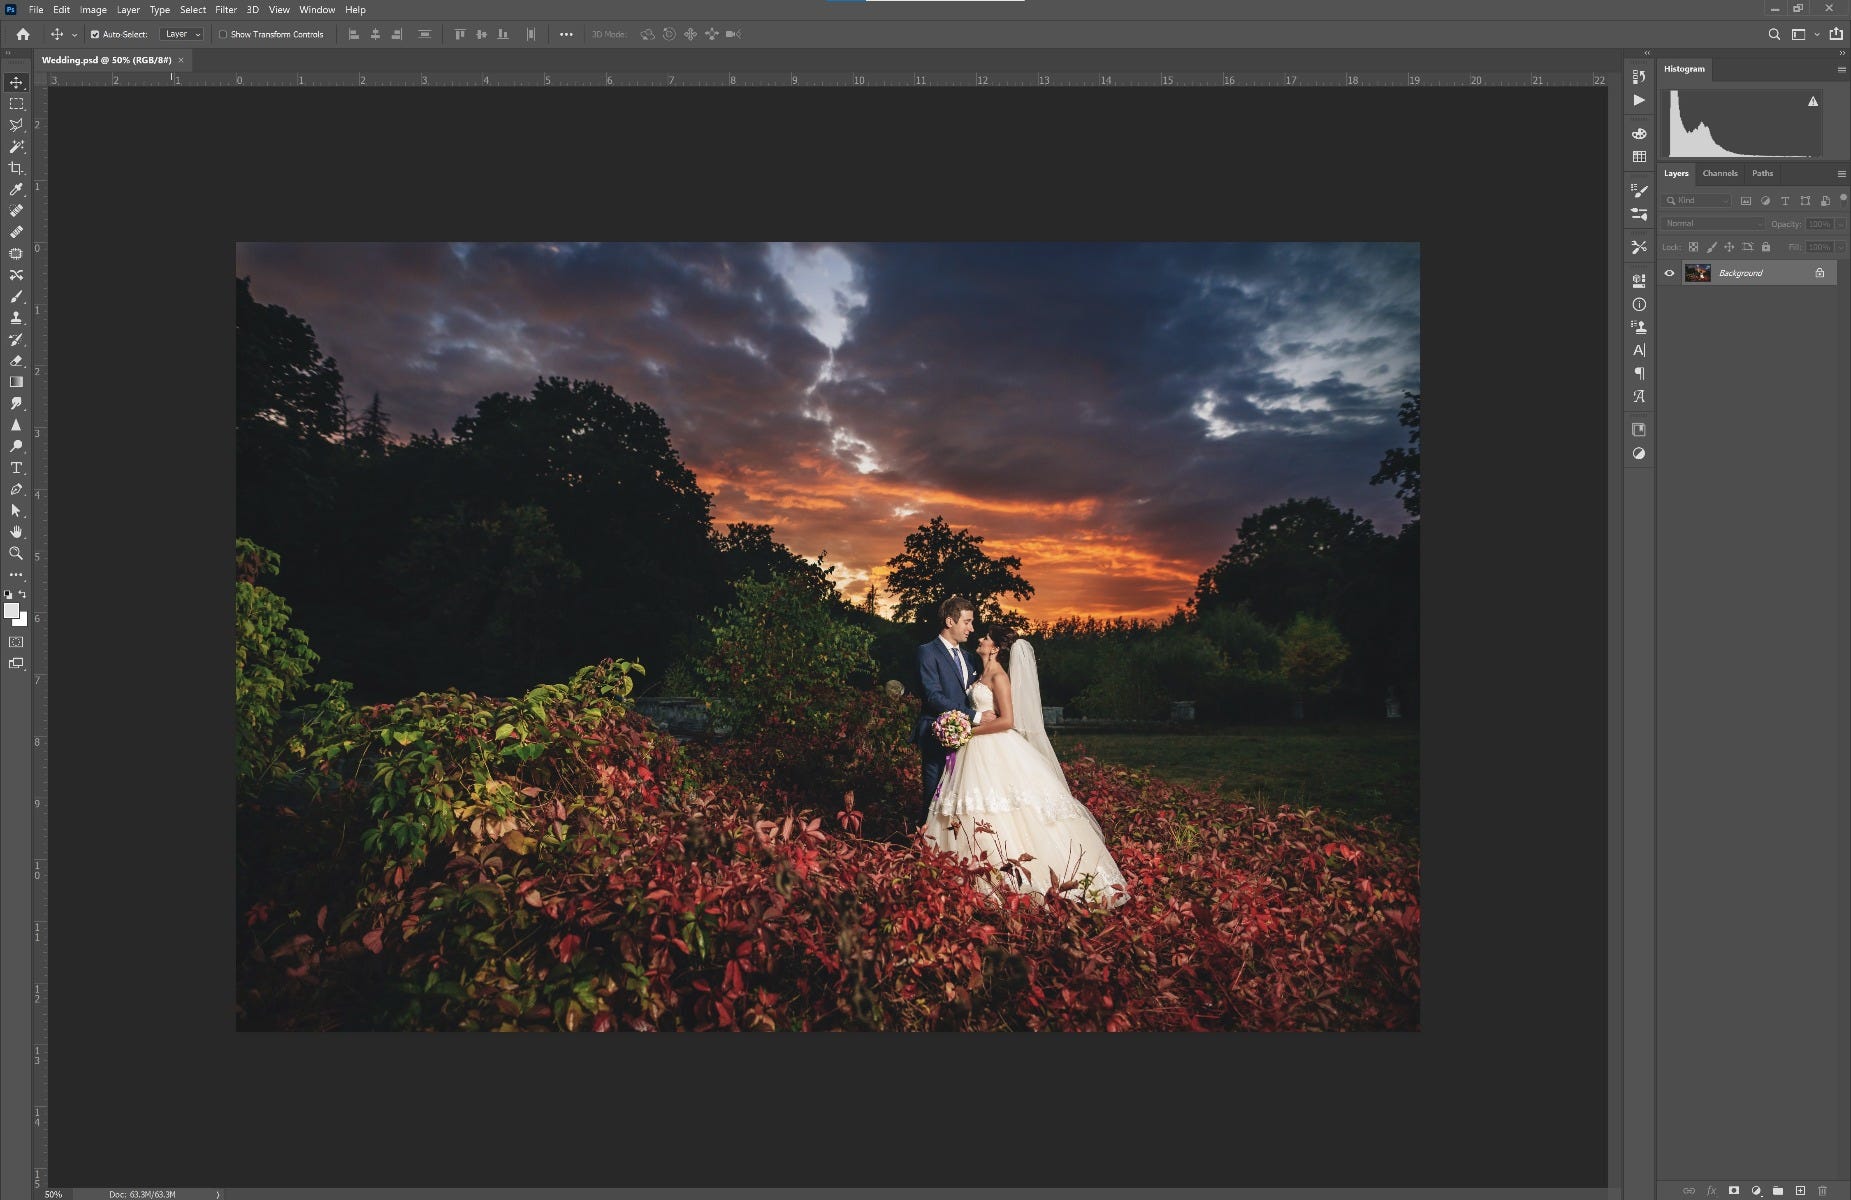
In the above example, this digital file is sized at 19.977 inches x 13.317 inches at 300 PPI. For this example, we will resize the file to be a complimentary aspect ratio to show as much as much of the image as possible. The most common aspect ratio for most cameras, including I-Phones, would be a 2:3 aspect ratio. Let’s say your client would like to order a 20" x 30" Canvas Wrap. If you would like an image wrap, do not forget to include the measurement for the wrap itself. For example, this file will be cropped at 23" x 33" at 150 PPI instead of 20" x 30" if we were to add 1.5" to all sides to order a Canvas Wrap PRO with the classic wrap option in the canvas builder.
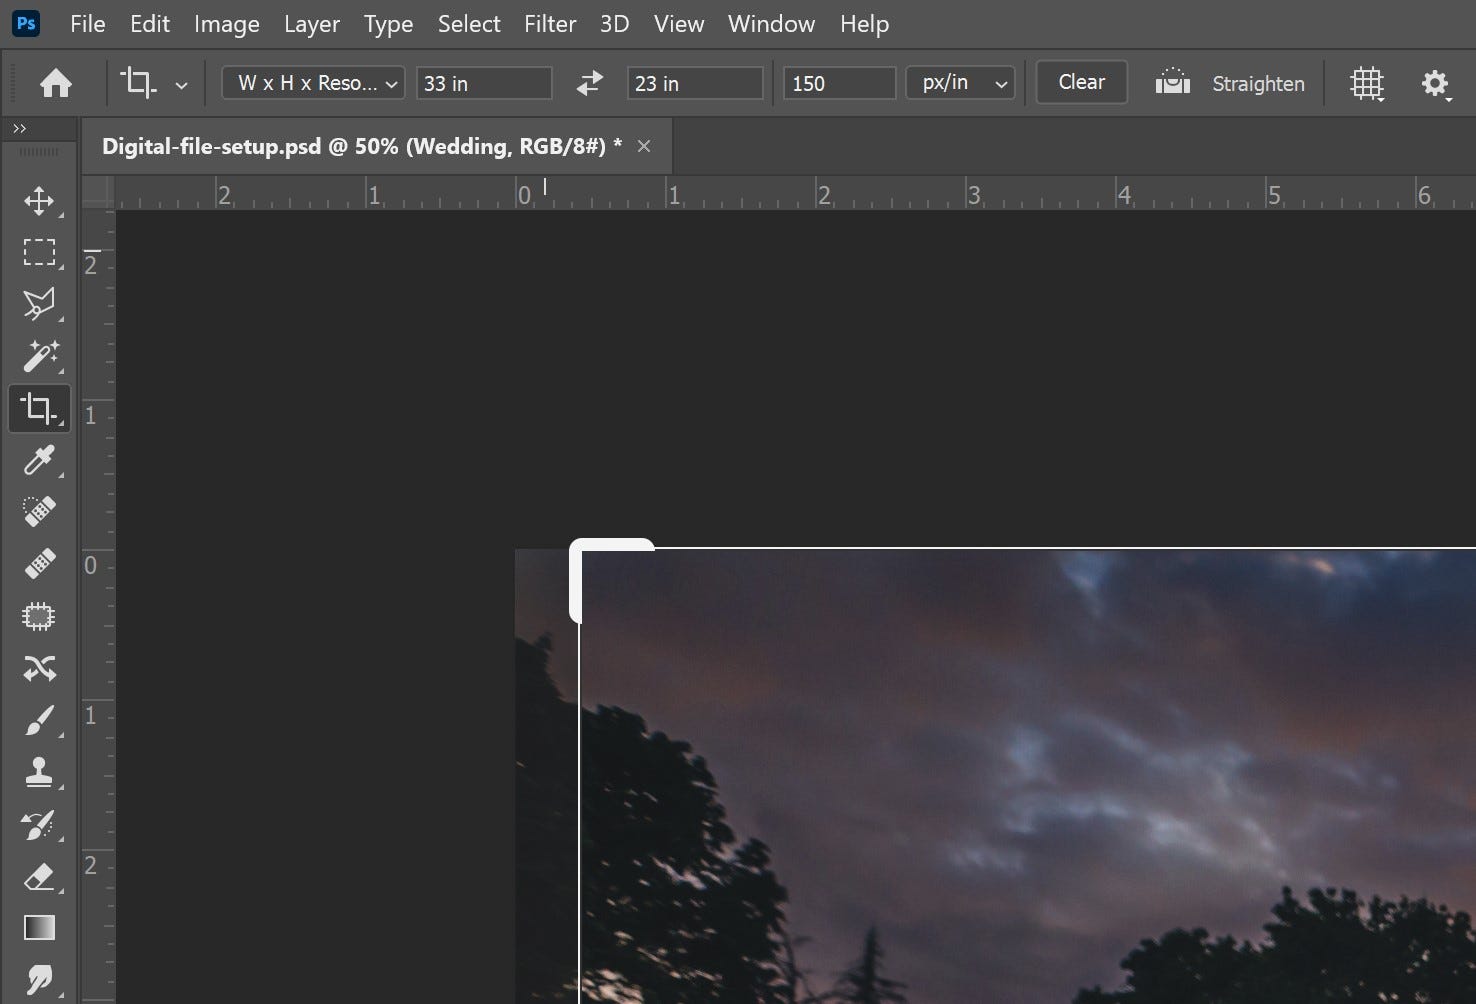
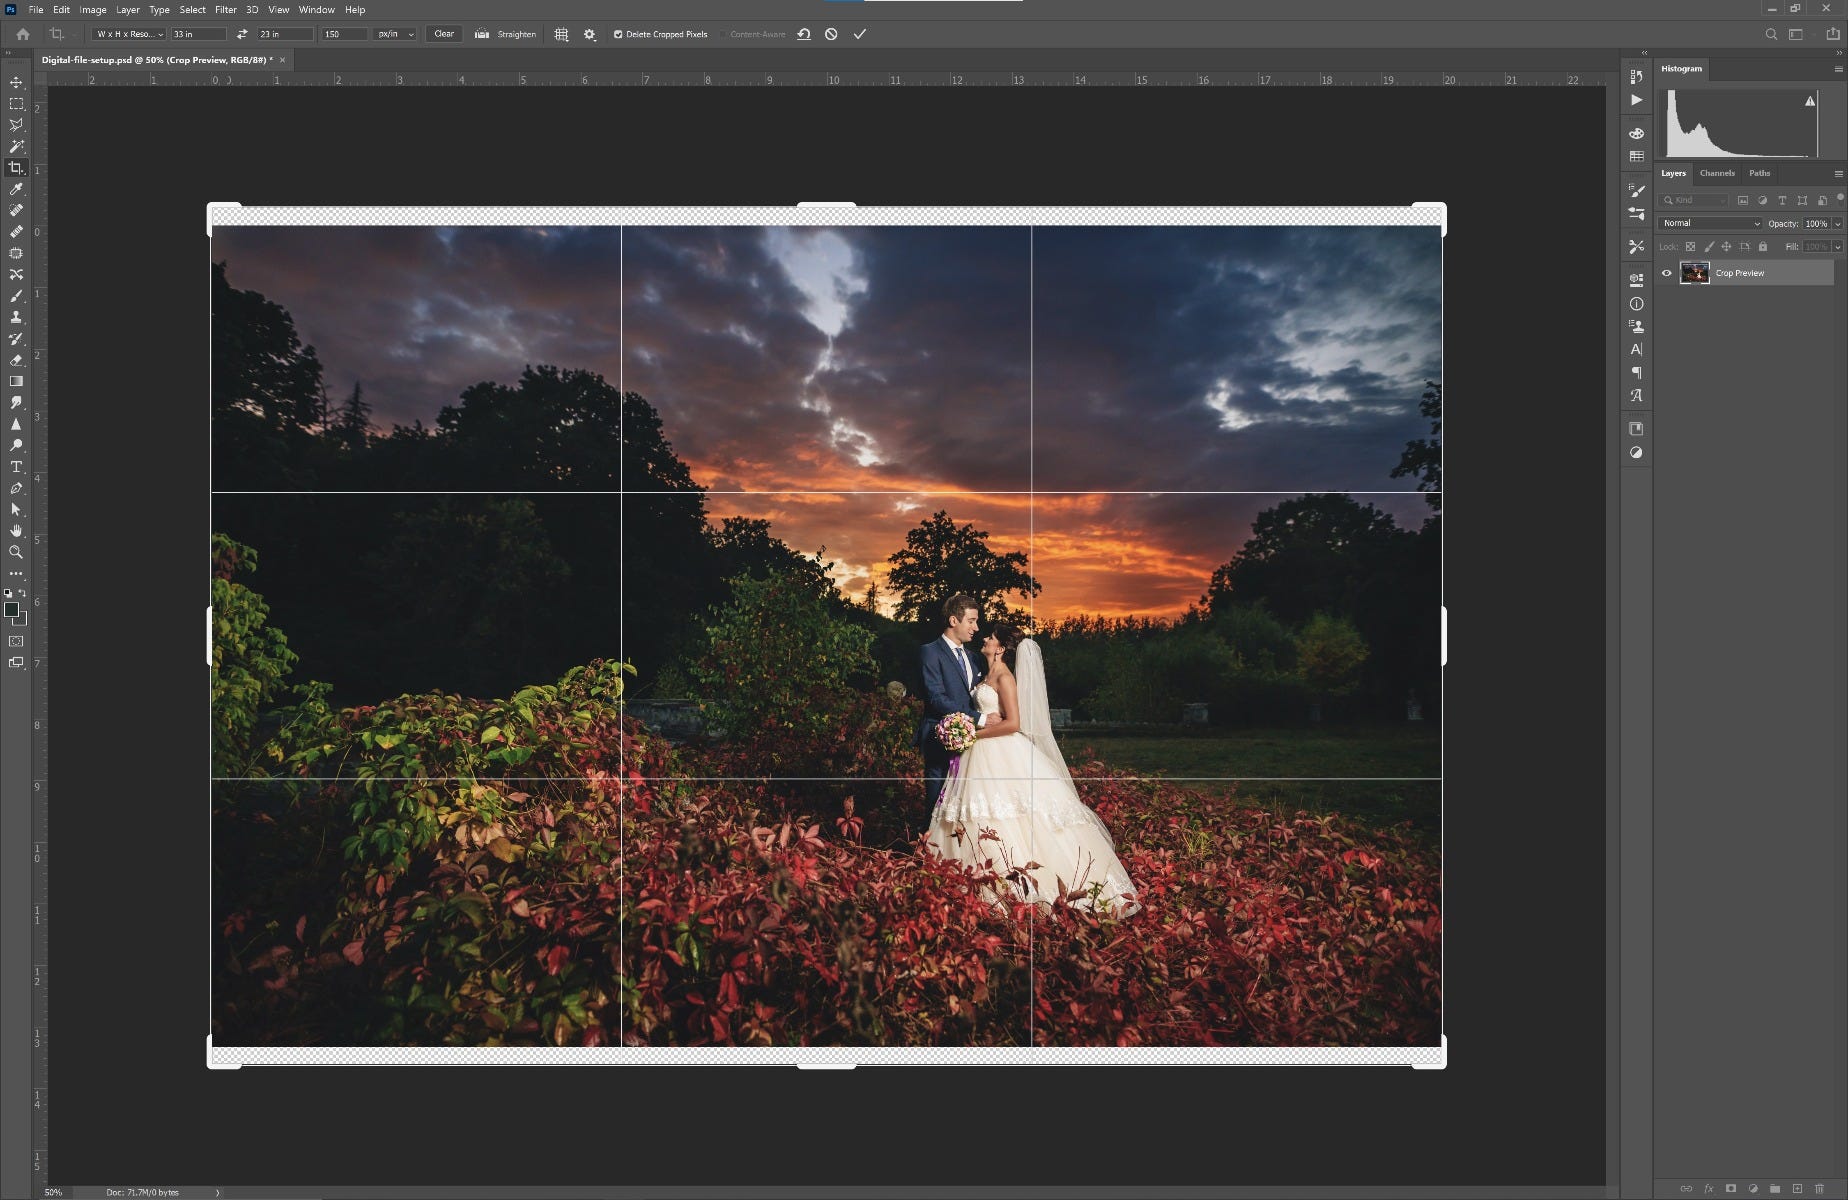
To show what your canvas will look like you can use our builder or build in Photoshop. For the Photoshop option click your Crop tool (Shortcut is C) on the left side bar. Select your crop tool, the top bar must say “W X H X Resolution”. Here you can enter 33 inches x 23 inches x 150 PX/IN in the resolution box. Notice in the above example how we are losing a small amount due to the ratio on the left and right side. There are a couple tricks to get around this if you think you or your client may not be happy. From here, you can stretch out the bottom corner of the crop box to include the full image. This will then apply a white area on top and bottom, which you will need to fix afterwards. After your crop window is set up as anticipated, press ENTER to crop. So you know exactly where the edge of your canvas is go ahead and set down guide lines on all four sides at 1.5 inches for the Solid-Faced Canvas wrap.
Now we need to do something about this white area on the top and bottom, as this will show on the wrap. There are many ways to do this. One of the easiest ones is a Tool Adobe introduced recently called “Content Aware Fill”. To use this Tool we first have to rasterize our image by right-click Rasterize Layer.
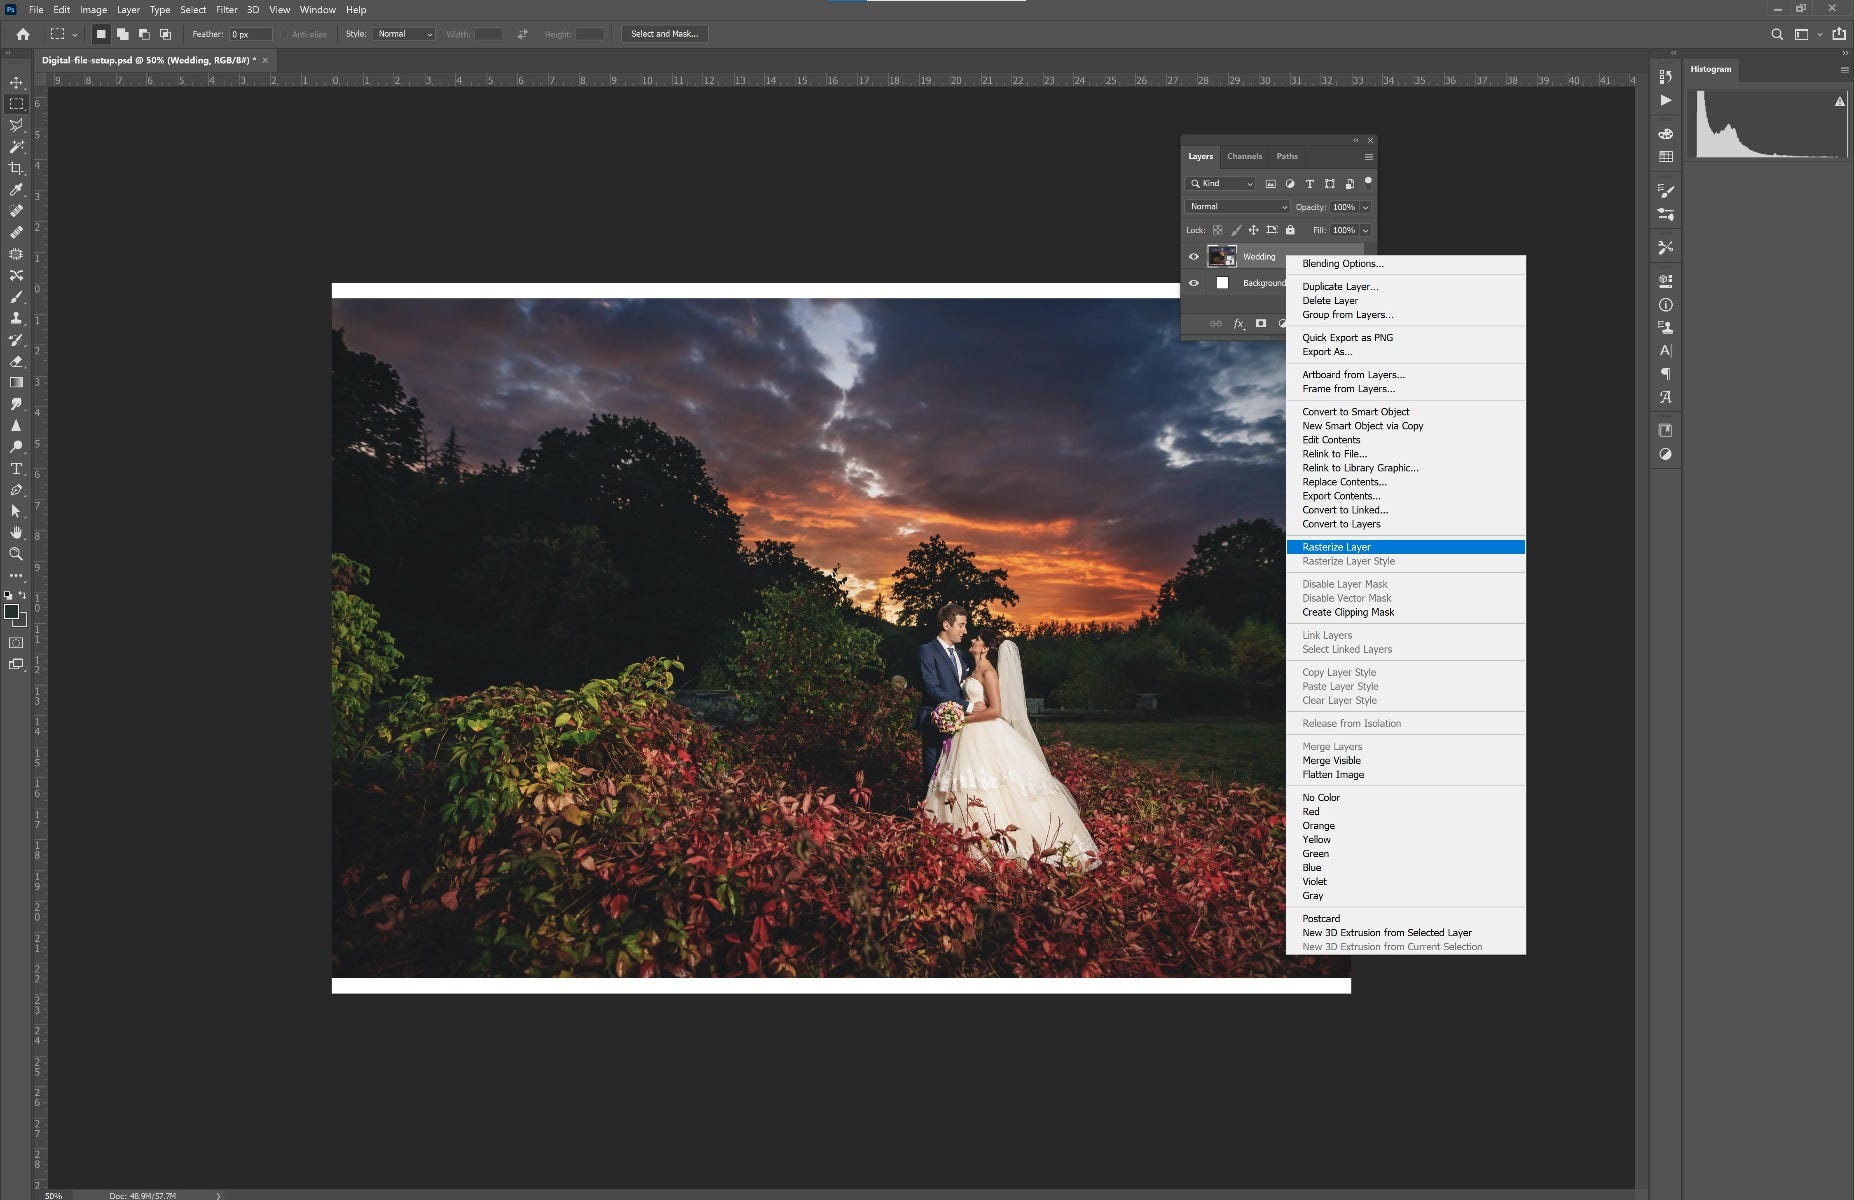
Then we select the white areas at the top and bottom with the Marquee Tool.
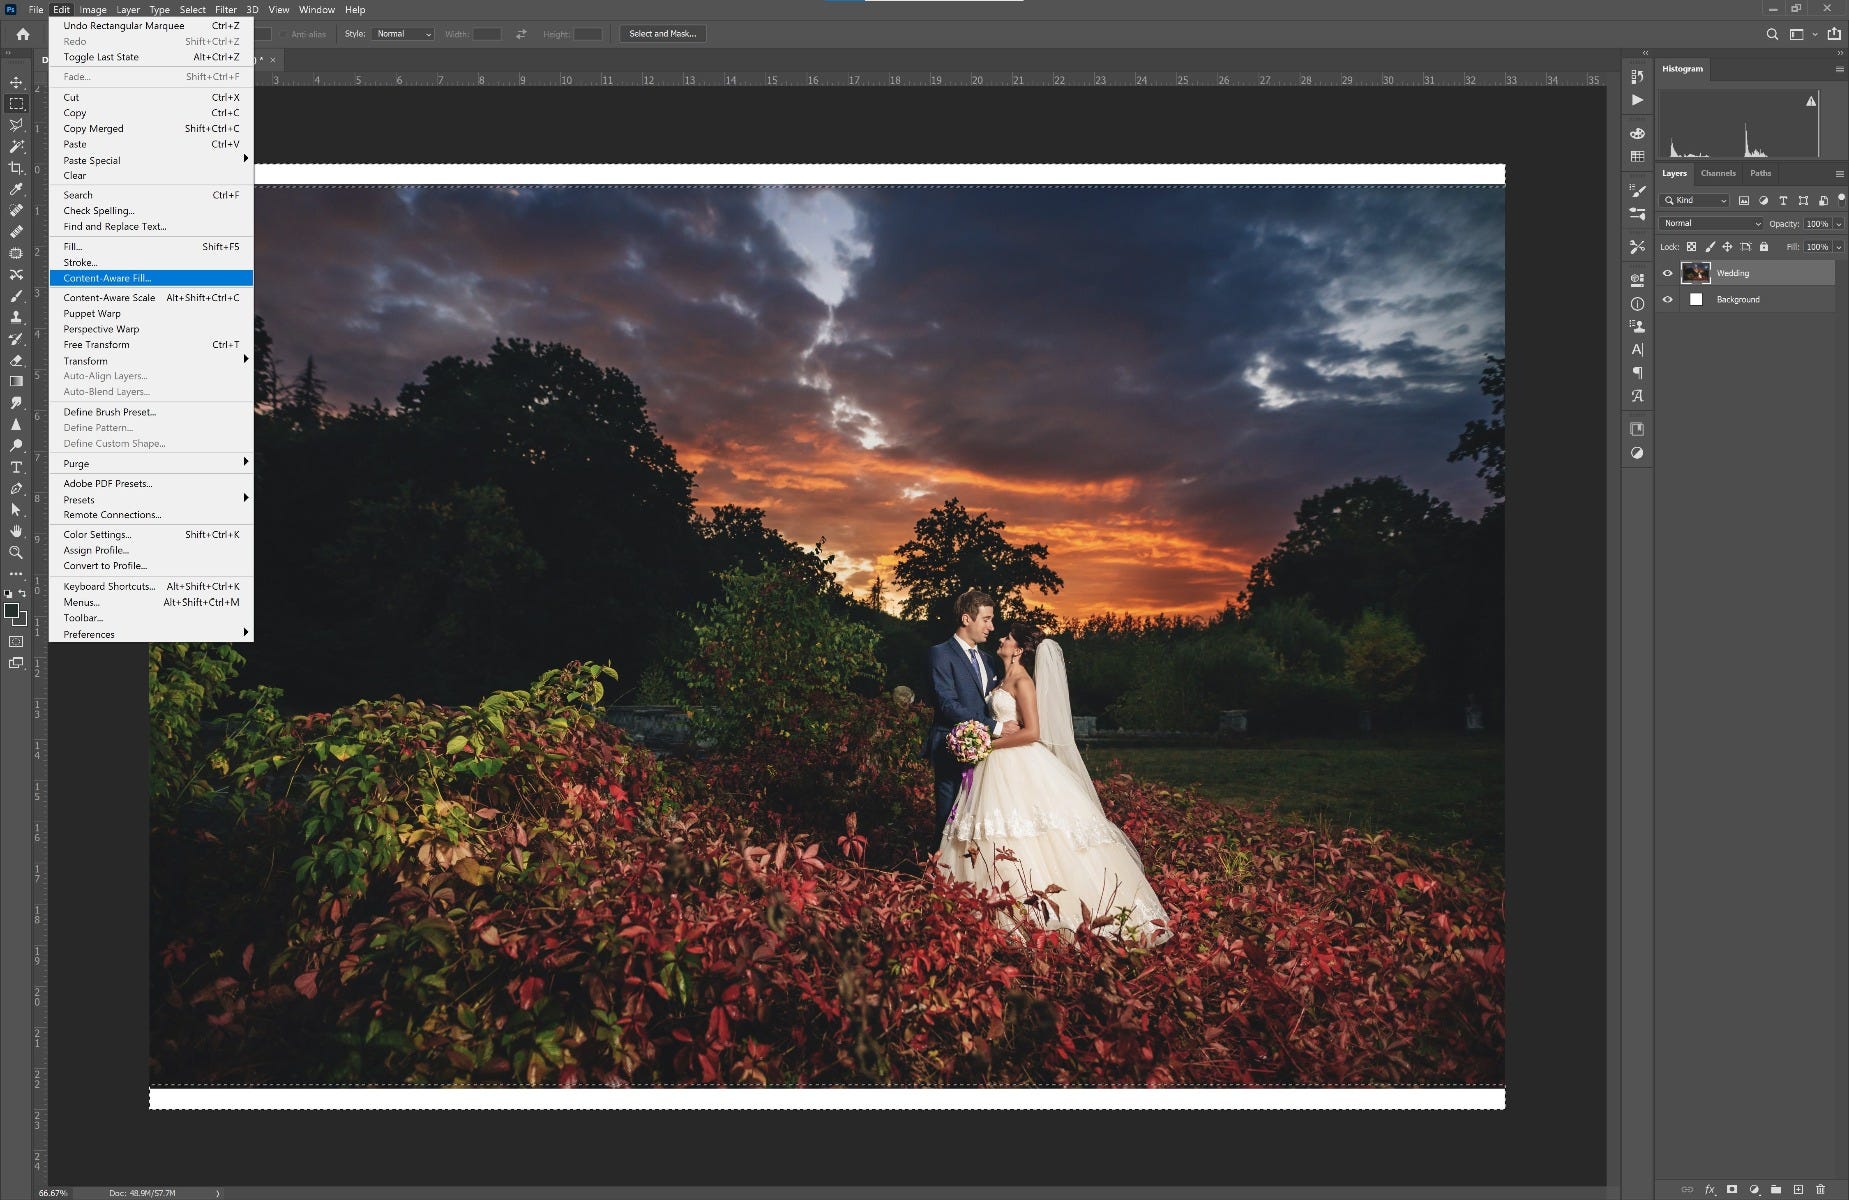
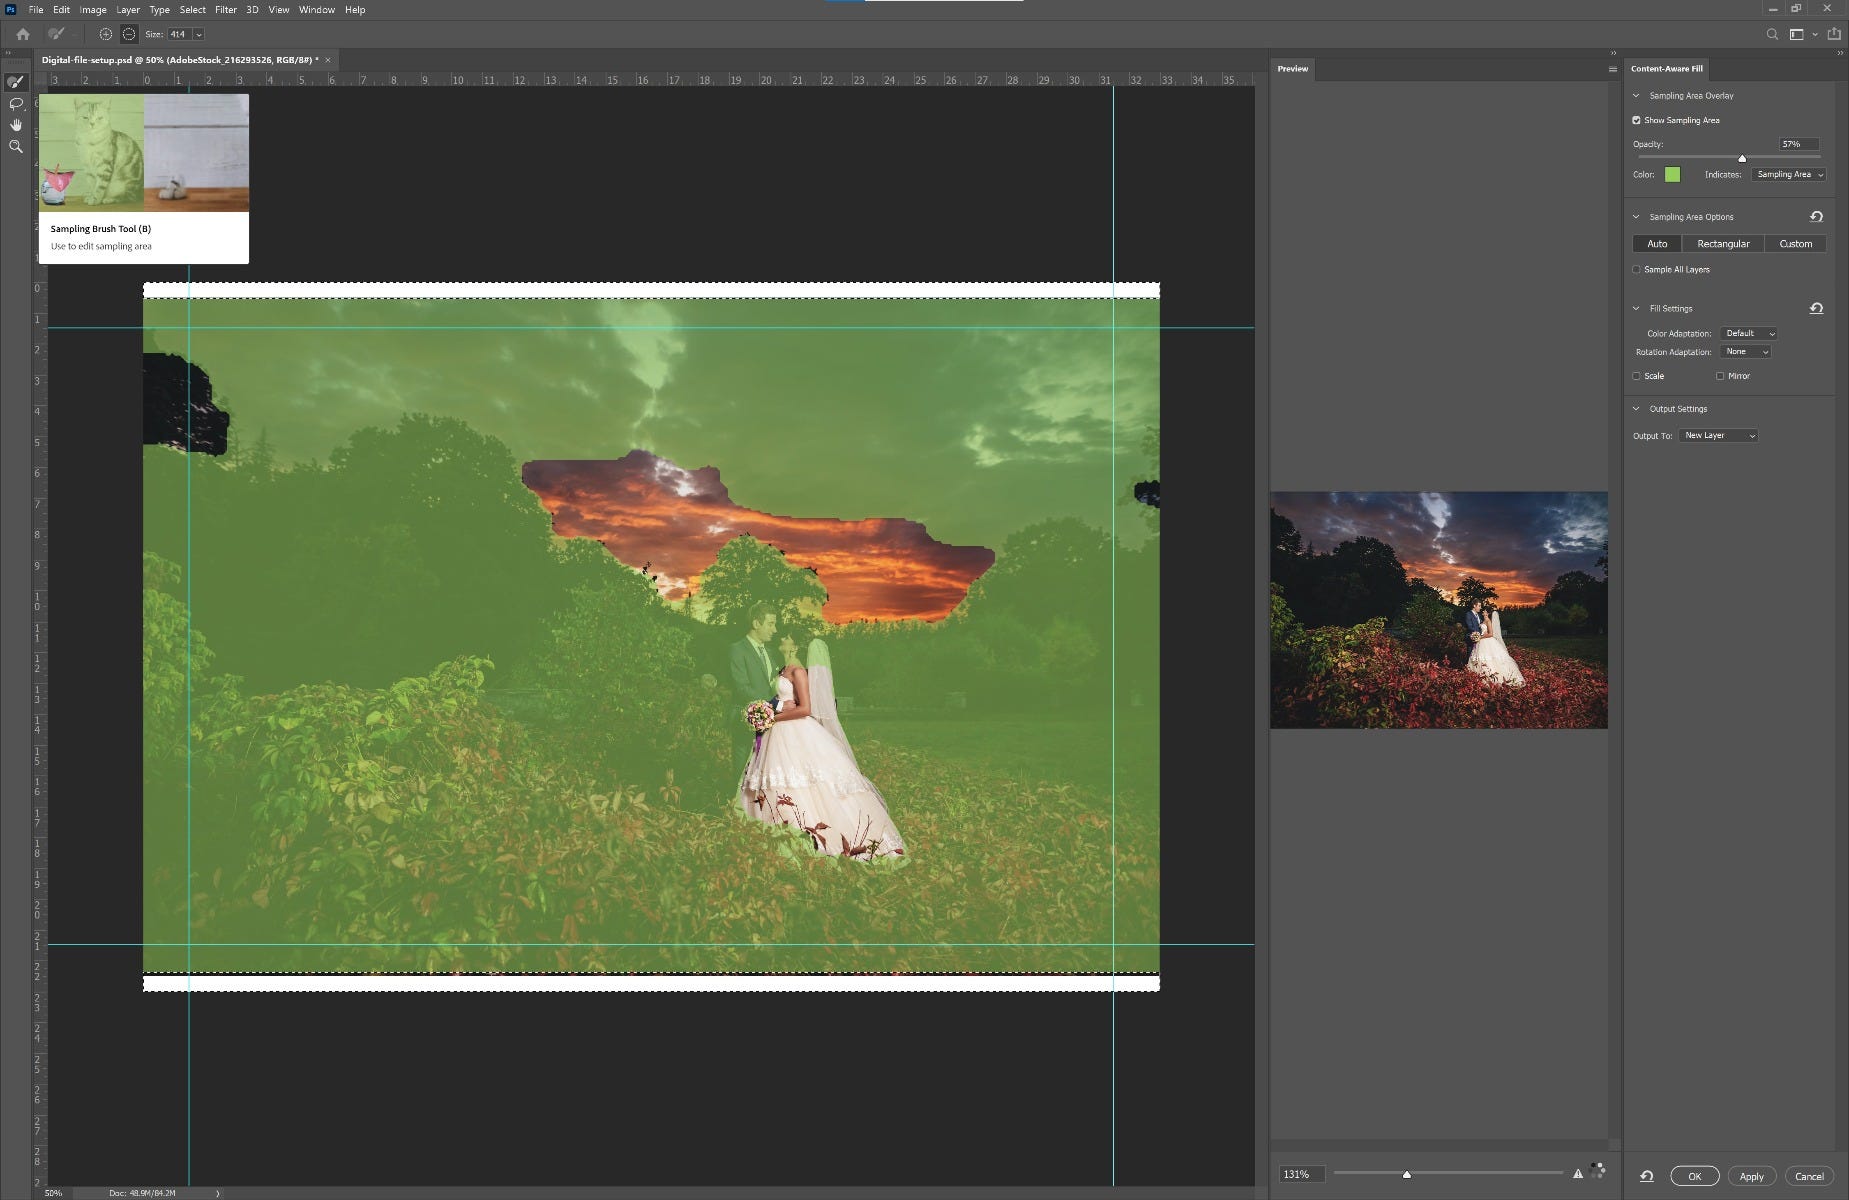
With the areas selected we go to Edit Content Aware Fill. Photoshop automatically selects content similar parts of the image to fill in the white area. You can always edit the sample areas with the Sample Brush Tool.
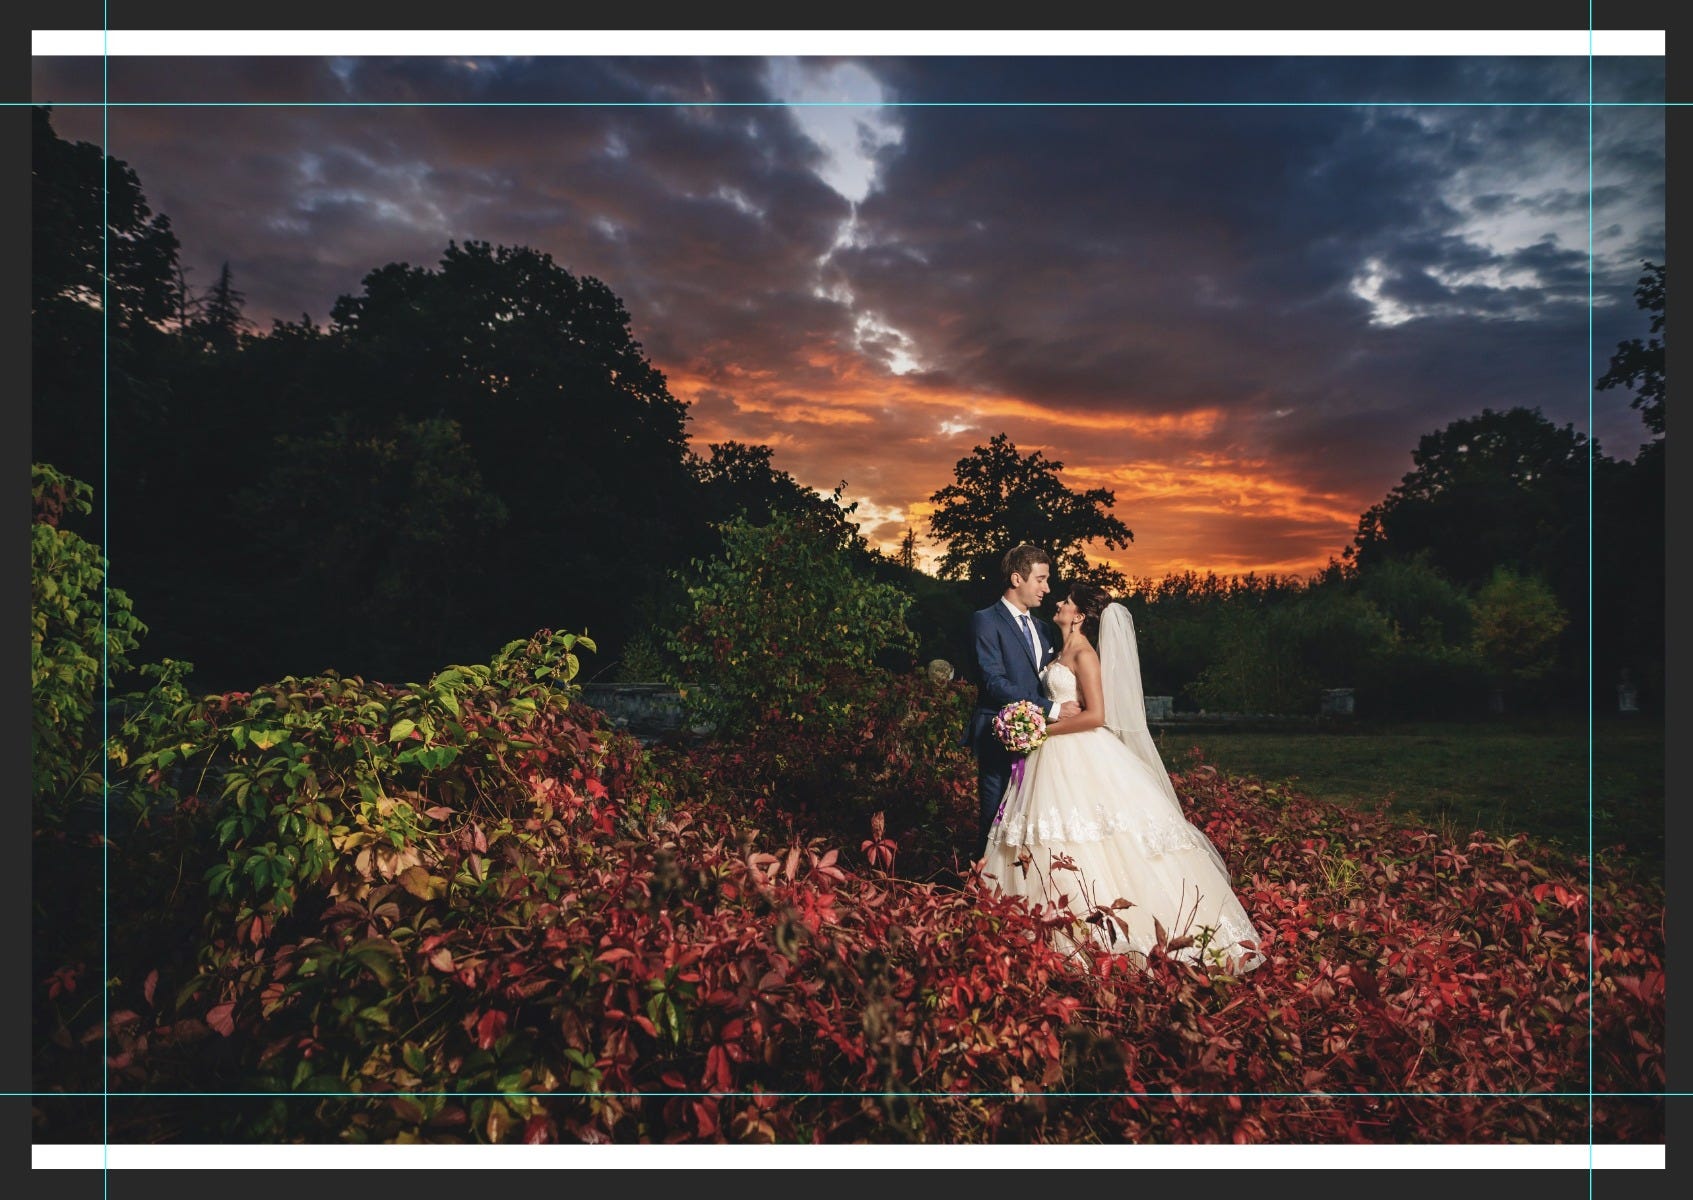
Before adding the edge
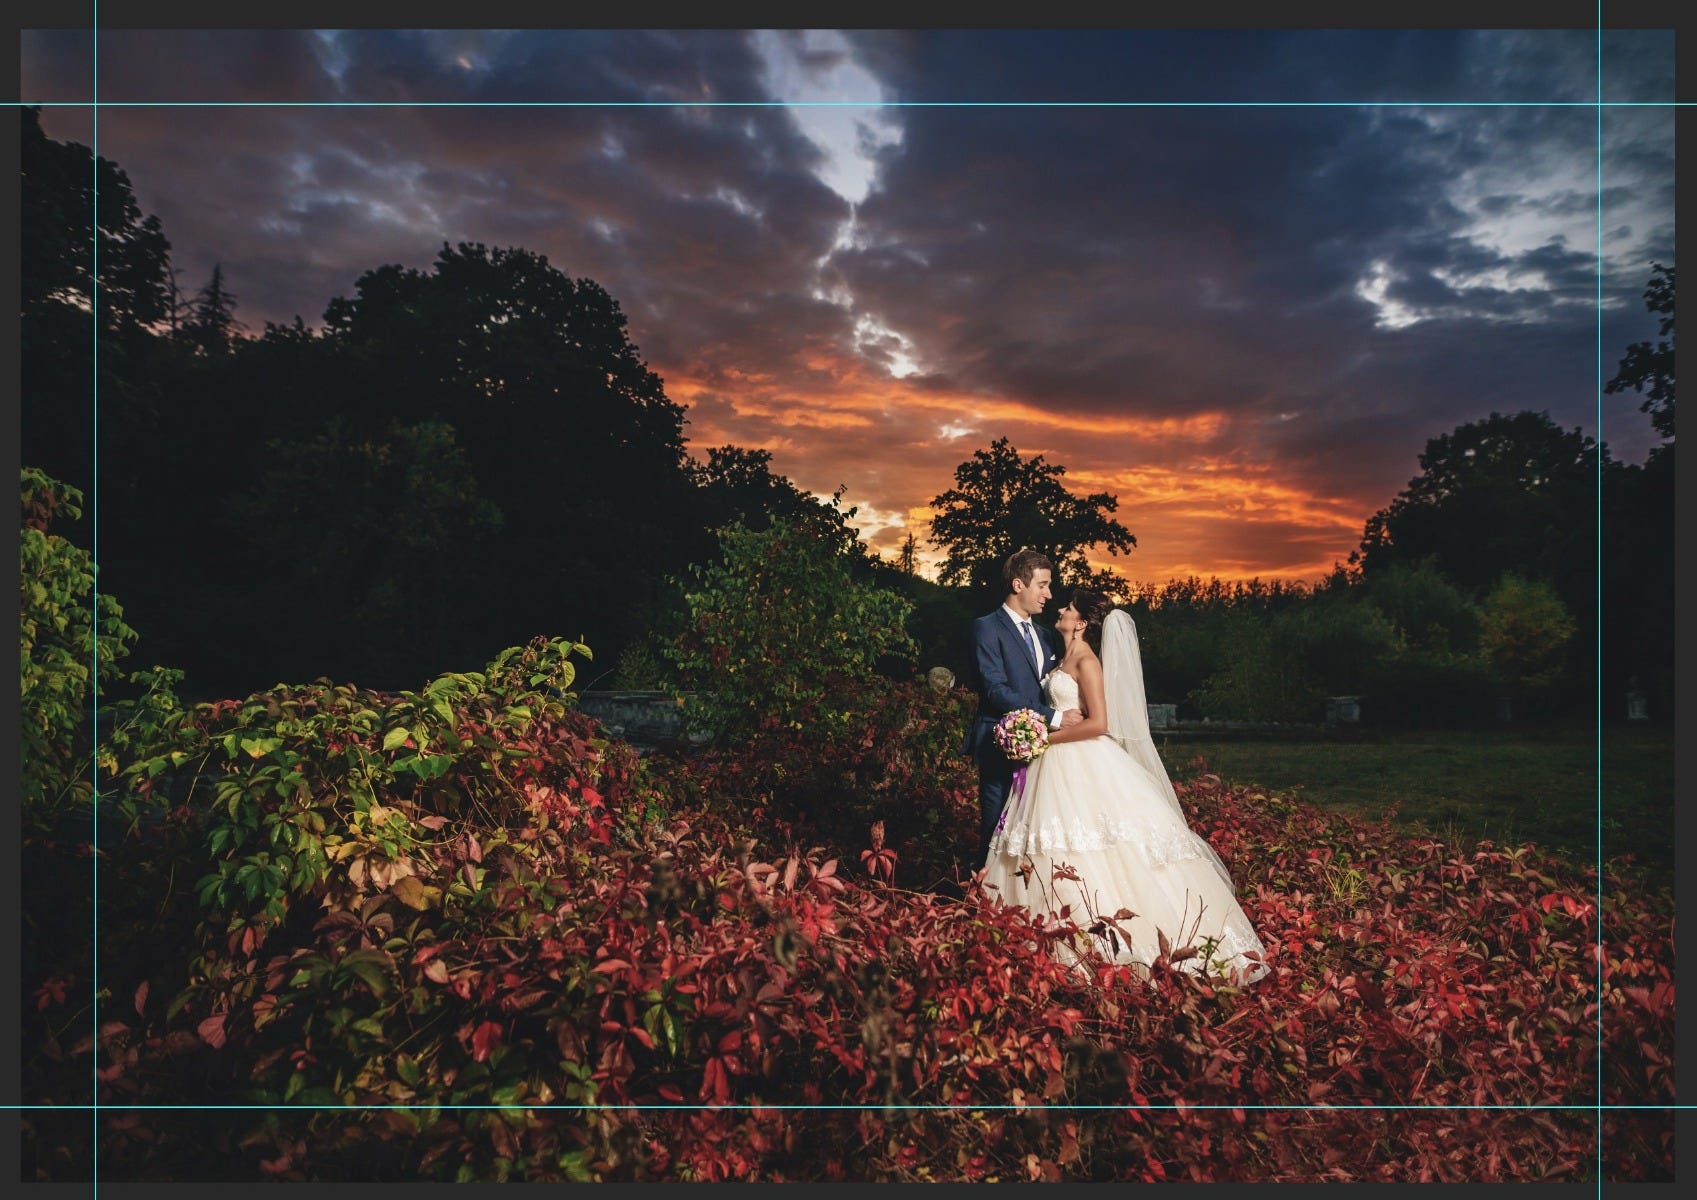
After adding the edge with content aware
Your image is now ready to print. Let’s say we want to show the full image on the front of the canvas and we don’t want to lose any of our artwork on the wrap. One approach is to set up your file at the desired canvas size (in this example we will continue to use 20" x 30") and upload to www.CgProPrints.com. CG Pro Prints does have an option built into their canvas editor tool for a solid color border wrap to show the most of the image as possible. To do this upload your file, then open the second drop down to select color wrap style. From here you can play around with color choices using the Custom button or Palette button to the right under "Border Color".


 In the above example, this digital file is sized at 19.977 inches x 13.317 inches at 300 PPI. For this example, we will resize the file to be a complimentary aspect ratio to show as much as much of the image as possible. The most common aspect ratio for most cameras, including I-Phones, would be a 2:3 aspect ratio. Let’s say your client would like to order a 20" x 30" Canvas Wrap. If you would like an image wrap, do not forget to include the measurement for the wrap itself. For example, this file will be cropped at 23" x 33" at 150 PPI instead of 20" x 30" if we were to add 1.5" to all sides to order a Canvas Wrap PRO with the classic wrap option in the canvas builder.
 To show what your canvas will look like you can use our builder or build in Photoshop. For the Photoshop option click your Crop tool (Shortcut is C) on the left side bar. Select your crop tool, the top bar must say “W X H X Resolution”. Here you can enter 33 inches x 23 inches x 150 PX/IN in the resolution box. Notice in the above example how we are losing a small amount due to the ratio on the left and right side. There are a couple tricks to get around this if you think you or your client may not be happy. From here, you can stretch out the bottom corner of the crop box to include the full image. This will then apply a white area on top and bottom, which you will need to fix afterwards. After your crop window is set up as anticipated, press ENTER to crop. So you know exactly where the edge of your canvas is go ahead and set down guide lines on all four sides at 1.5 inches for the Solid-Faced Canvas wrap.
 Now we need to do something about this white area on the top and bottom, as this will show on the wrap. There are many ways to do this. One of the easiest ones is a Tool Adobe introduced recently called “Content Aware Fill”. To use this Tool we first have to rasterize our image by right-click Rasterize Layer.
 Then we select the white areas at the top and bottom with the Marquee Tool.
 With the areas selected we go to Edit Content Aware Fill. Photoshop automatically selects content similar parts of the image to fill in the white area. You can always edit the sample areas with the Sample Brush Tool.

 Before adding the edge
 After adding the edge with content aware
Your image is now ready to print. Let’s say we want to show the full image on the front of the canvas and we don’t want to lose any of our artwork on the wrap. One approach is to set up your file at the desired canvas size (in this example we will continue to use 20" x 30") and upload to www.CgProPrints.com. CG Pro Prints does have an option built into their canvas editor tool for a solid color border wrap to show the most of the image as possible. To do this upload your file, then open the second drop down to select color wrap style. From here you can play around with color choices using the Custom button or Palette button to the right under "Border Color".
